Using PEST to Test Form Validations: Require, Type, Length, and More
Published on February 22sd, 2024.
Introduction
In the realm of web development, integrating various technologies seamlessly can significantly streamline the development process. Laravel, Inertia, and Vue.js, when combined as a monolith, offer a powerful stack for building modern web applications. In this post, we'll explore how these technologies integrate and how we can leverage PEST to test form validations effectively.
In this tutorial, we'll cover the following topics:
- * Understand about Laravel, Inertia, Vue.js and PEST working in a Monolith
- * Use Laravel Jetstream as a starting point for our application
- * How to conver form validation from client side in PEST like required fields, data types, field lengths, and more.
Laravel, Inertia, and Vue.js as a Monolith Before delving into form validations and testing, let's briefly discuss the synergy between Laravel, Inertia, and Vue.js. Laravel serves as the backend framework, providing robust features for routing, database interaction, and validation. Inertia.js facilitates the creation of single-page applications by allowing us to use Vue.js components within Laravel views seamlessly.
Integration and Validation One notable aspect of this integration is the handling of form validations. While Vue.js enables client-side validation, Laravel's validation capabilities are equally powerful and can be seamlessly integrated into our application. By validating forms on the server-side with Laravel, we ensure consistent validation rules across the application and enhance security.
Introduction to PEST Now, let's introduce PEST. PEST is a delightful PHP testing framework that focuses on simplicity and readability. It allows us to write expressive and feature-rich tests that ensure our application behaves as expected. In this tutorial, we'll harness the power of PEST to include form validations in our test suite seamlessly.
Getting Started with Laravel Jetstream To kickstart our journey into testing form validations, we'll use Laravel Jetstream, a popular scaffolding tool for Laravel applications. Jetstream provides authentication, team management, and robust scaffolding for our Laravel applications, allowing us to focus on building features rather than reinventing the wheel.
In the upcoming sections, we'll dive into practical examples of using PEST to test various form validations, including required fields, data types, field lengths, and more. By the end of this tutorial, you'll have a solid understanding of how to leverage PEST to ensure the integrity and reliability of your form validations.
Stay tuned for the next installment, where we'll delve into writing PEST tests for form validations in Laravel Jetstream.
Starting a New Laravel Project
Let's start with a new Laravel Jetstream project. You can create a new Laravel Jetstream project using the following command:
Open you form-validation project in Visual Studio Code and let's start the app. The Laravel home page will be displayed in your browser. 
Installing Jetstream and Building the NPM Dependencies and Migrating the Database
Now, let's install Jetstream using the following command: Then, we'll install Jetstream with the Inertia stack: After installing Jetstream, you should install and build your NPM dependencies and migrate your database: After customizing these components, you should rebuild your assets:
Your page will look like this: 
Register a user and login to the application. You will see the dashboard page. 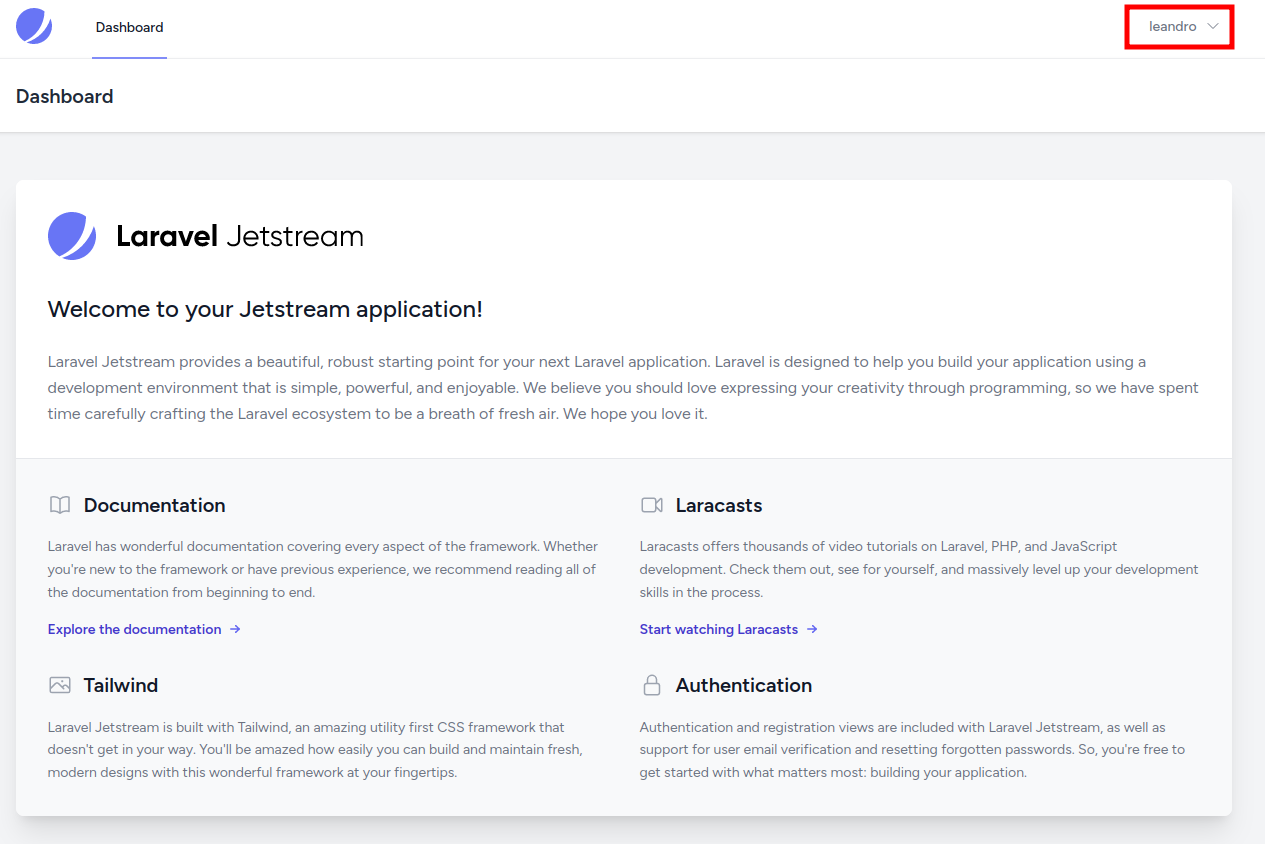
Let's understand out goal
Form validation is a crucial aspect of web applications. It important to ensure that these rules are checked in server-side and in tests as well. 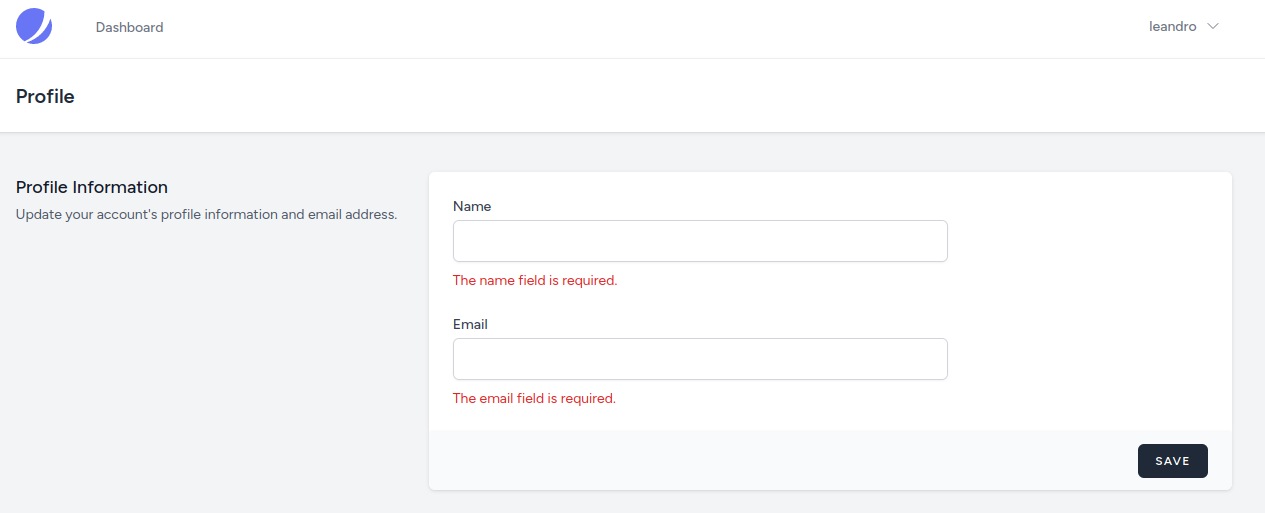
In controller validation we have the following rules:
- name has 3 validations: required, string type and max length
- email has 4 validations: required, email type, max length and unique
- photo has 3 validations: nullable, mimes and max length
Look at the following code to understand the validation rules in the controller:
<?php

namespace App\Actions\Fortify;

use App\Models\User;
use Illuminate\Contracts\Auth\MustVerifyEmail;
use Illuminate\Support\Facades\Validator;
use Illuminate\Validation\Rule;
use Laravel\Fortify\Contracts\UpdatesUserProfileInformation;

class UpdateUserProfileInformation implements UpdatesUserProfileInformation
{
    /**
     * Validate and update the given user's profile information.
     *
     * @param  array<string, mixed>  $input
     */
    public function update(User $user, array $input): void
    {
        Validator::make($input, [
            'name' => ['required', 'string', 'max:255'],
            'email' => ['required', 'email', 'max:255', Rule::unique('users')->ignore($user->id)],
            'photo' => ['nullable', 'mimes:jpg,jpeg,png', 'max:1024'],
        ])->validateWithBag('updateProfileInformation');

        if (isset($input['photo'])) {
            $user->updateProfilePhoto($input['photo']);
        }

        if ($input['email'] !== $user->email &&
            $user instanceof MustVerifyEmail) {
            $this->updateVerifiedUser($user, $input);
        } else {
            $user->forceFill([
                'name' => $input['name'],
                'email' => $input['email'],
            ])->save();
        }
    }

    /**
     * Update the given verified user's profile information.
     *
     * @param  array<string, string>  $input
     */
    protected function updateVerifiedUser(User $user, array $input): void
    {
        $user->forceFill([
            'name' => $input['name'],
            'email' => $input['email'],
            'email_verified_at' => null,
        ])->save();

        $user->sendEmailVerificationNotification();
    }
}
Installing PEST and Writing Tests.
Let's use pest to check the validation controller First, let's install pest using the following command: Then, create a new test file using the following command: If this file doesn't exit. Create it.
<?php

/*
|--------------------------------------------------------------------------
| Test Case
|--------------------------------------------------------------------------
|
| The closure you provide to your test functions is always bound to a specific PHPUnit test
| case class. By default, that class is "PHPUnit\Framework\TestCase". Of course, you may
| need to change it using the "uses()" function to bind a different classes or traits.
|
*/

uses(
    Tests\TestCase::class,
    // Illuminate\Foundation\Testing\RefreshDatabase::class,
)->in('Feature');

/*
|--------------------------------------------------------------------------
| Expectations
|--------------------------------------------------------------------------
|
| When you're writing tests, you often need to check that values meet certain conditions. The
| "expect()" function gives you access to a set of "expectations" methods that you can use
| to assert different things. Of course, you may extend the Expectation API at any time.
|
*/

expect()->extend('toBeOne', function () {
    return $this->toBe(1);
});

/*
|--------------------------------------------------------------------------
| Functions
|--------------------------------------------------------------------------
|
| While Pest is very powerful out-of-the-box, you may have some testing code specific to your
| project that you don't want to repeat in every file. Here you can also expose helpers as
| global functions to help you to reduce the number of lines of code in your test files.
|
*/<?php
use App\Models\User;
$user;
// This is a setup function that will be called before each test. In this case, we are creating a user and logging in as that user.
beforeEach(function () use (&$user) {
if (!$user) {
$user = User::factory()->create();
}
test()->actingAs($user);
});
describe('test required fields', function () use (&$user) {
test('all of then', function () {
$response = test()->put('/user/profile-information', [
'name' => '',
'email' => '',
]);
$response->assertStatus(302);
$response->assertSessionHasErrors();
$errors = session('errors')->getBag('updateProfileInformation');
$this->assertTrue($errors->has('name'));
$this->assertEquals(['The name field is required.'], $errors->get('name'));
$this->assertTrue($errors->has('email'));
$this->assertEquals(['The email field is required.'], $errors->get('email'));
});
test('name individually', function () use (&$user) {
$response = test()->put('/user/profile-information', [
'name' => '',
'email' => $user->email,
]);
$response->assertStatus(302);
$response->assertSessionHasErrors();
$errors = session('errors')->getBag('updateProfileInformation');
$this->assertTrue($errors->has('name'));
$this->assertEquals(['The name field is required.'], $errors->get('name'));
});
test('email individually', function () use (&$user) {
$response = test()->put('/user/profile-information', [
'name' => $user->name,
'email' => '',
]);
$response->assertStatus(302);
$response->assertSessionHasErrors();
$errors = session('errors')->getBag('updateProfileInformation');
$this->assertTrue($errors->has('email'));
$this->assertEquals(['The email field is required.'], $errors->get('email'));
});
});
test('test max length fields', function () {
$response = test()->put('/user/profile-information', [
'name' => 'This is a very long name that exceeds the limit of 255 characters. This is just a dummy example to illustrate a name longer than 255 characters. Lorem ipsum dolor sit amet, consectetur adipiscing elit. Sed do eiusmod tempor incididunt ut labore et dolore magna aliqua. Ut enim ad minim veniam, quis nostrud exercitation ullamco laboris nisi ut aliquip ex ea commodo consequat.',
'email' => 'ThisIsAVeryLongEmailAddressThatExceedsTheLimitOf255CharactersThisIsJustADummyExampleToIllustrateAnEmailAddressLongerThan255CharactersLoremIpsumDolorSitAmetConsecteturAdipiscingElitSedDoEiusmodTemporIncididuntUtLaboreEtDoloreMagnaAliquaUtEnimAdMinimVeniamQuisNostrudExercitationUllamcoLaborisNisiUtAliquipExEaCommodoConsequat@example.com',
]);
$response->assertStatus(302);
$response->assertSessionHasErrors();
$errors = session('errors')->getBag('updateProfileInformation');
$this->assertTrue($errors->has('name'));
$this->assertEquals(['The name field must not be greater than 255 characters.'], $errors->get('name'));
$this->assertTrue($errors->has('email'));
$this->assertEquals(['The email field must not be greater than 255 characters.'], $errors->get('email'));
});
describe('test email', function () {
test('as valid', function () {
$invalidEmails = [
'test',
'test@',
// 'test@example', // It shold be an invalid email address, but it's not.
'test@example.',
];
foreach ($invalidEmails as $invalidEmail) {
$response = $this->put('/user/profile-information', [
'name' => 'test',
'email' => $invalidEmail,
]);
$response->assertStatus(302);
$response->assertSessionHasErrors();
$errors = session('errors')->getBag('updateProfileInformation');
$this->assertTrue($errors->has('email'));
$this->assertEquals(['The email field must be a valid email address.'], $errors->get('email'));
}
});
test('as unique', function () {
$this->actingAs(User::factory()->create());
$user = User::factory()->create();
$response = $this->put('/user/profile-information', [
'name' => 'test',
'email' => $user->email,
]);
$response->assertStatus(302);
$response->assertSessionHasErrors();
$errors = session('errors')->getBag('updateProfileInformation');
$this->assertTrue($errors->has('email'));
$this->assertEquals(['The email has already been taken.'], $errors->get('email'));
});
});
describe('test photo', function () {
test('as max size', function () {
$response = $this->put('/user/profile-information', [
'name' => 'test',
'email' => 'test@laravel.com',
'photo' => \Illuminate\Http\Testing\File::image('photo.jpg')->size(1025),
]);
$response->assertStatus(302);
$response->assertSessionHasErrors();
$errors = session('errors')->getBag('updateProfileInformation');
$this->assertTrue($errors->has('photo'));
$this->assertEquals(['The photo field must not be greater than 1024 kilobytes.'], $errors->get('photo'));
});
test('with mimes types', function () {
$response = $this->put('/user/profile-information', [
'name' => 'test',
'email' => 'test@laravel.com',
'photo' => \Illuminate\Http\Testing\File::image('photo.gif'),
]);
$response->assertStatus(302);
$response->assertSessionHasErrors();
$errors = session('errors')->getBag('updateProfileInformation');
$this->assertTrue($errors->has('photo'));
$this->assertEquals(['The photo field must be a file of type: jpg, jpeg, png.'], $errors->get('photo'));
});
});
test('test with valid inputs', function () use (&$user) {
$response = $this->put('/user/profile-information', [
'name' => $user->name,
'email' => $user->email,
'photo' => \Illuminate\Http\Testing\File::image('photo.jpg'),
]);
$response->assertStatus(302);
$response->assertSessionHasNoErrors();
});It's time to test!!!
Run the tests using the following command: You will see the following output: 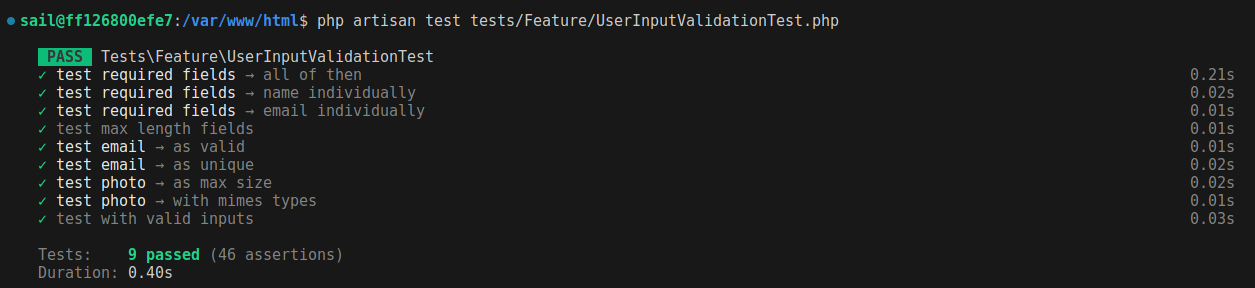 If we change email require validation, we will see the following output:
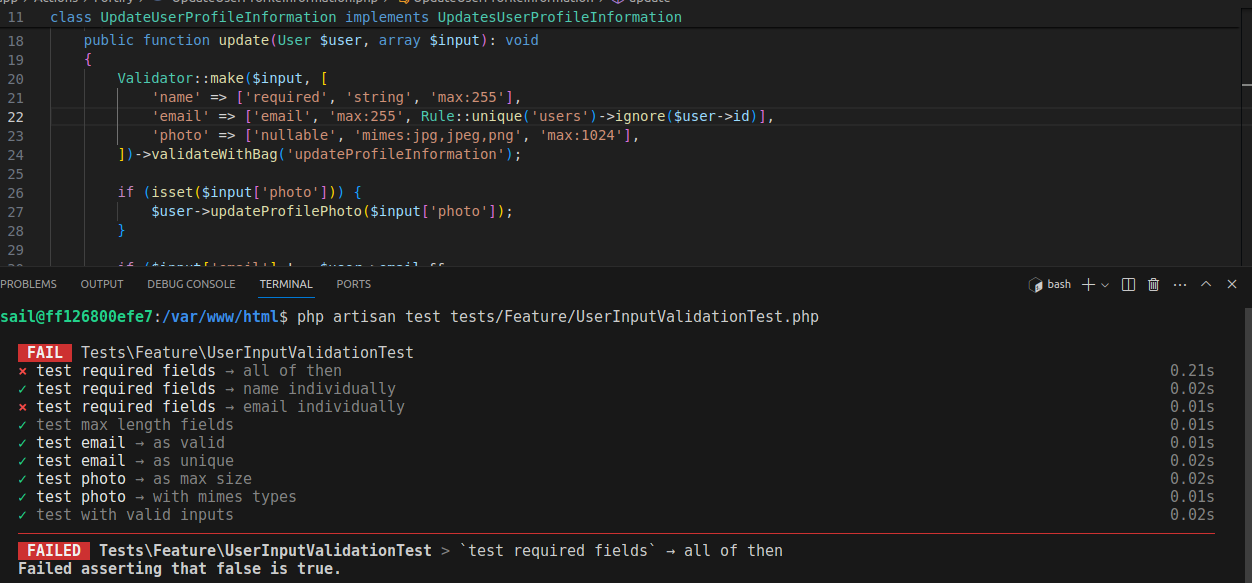
That's it! We explored the integration of Laravel, Inertia, and Vue.js and how we can leverage PEST to test form validations effectively. We used Laravel Jetstream as a starting point for our application and covered various form validations, including required fields, data types, field lengths, and more. By the end of this tutorial, you should have a solid understanding of how to use PEST to ensure the integrity and reliability of your form validations.
In the next installment, we'll delve into writing PEST tests for form validations in Laravel Jetstream. Stay tuned!